Your Ice Maker Making Ice But Not Dumping? (Details Guide)
If your ice maker is making ice but not dumping, it could be due to a few potential issues. First, check if the ice bin is full or if there’s an obstruction preventing the ice from falling. Additionally, inspect the ice maker’s motor and thermostat to ensure they’re functioning correctly. If none of these solutions work, it may be best to consult a professional technician for further diagnosis and repair.
Why Is My Refrigerator Making Ice But Not Dispensing?
If your refrigerator is making ice but not dispensing it, there are several possible reasons for this issue. Here are some common troubleshooting steps you can take to identify and potentially fix the problem:
1. Larger Ice Cubes
If your refrigerator is producing larger ice cubes than usual, there are a few potential causes and corresponding solutions to consider.
One possibility is that the water fill level in the ice maker needs adjustment. You can usually find a water fill adjustment screw on the side of the ice maker. By turning this screw counterclockwise, you can reduce the amount of water entering the ice mold, resulting in smaller ice cubes. After making this adjustment, allow the ice maker to cycle and produce a batch of ice to see if the issue is resolved.
Another factor to check is the water pressure. Ensure that the water supply to the refrigerator is at an appropriate pressure. If it’s too high, it can lead to larger ice cubes. Installing a water pressure regulator, if necessary, can help maintain the right level.
Inspecting the water inlet valve is also crucial. This valve controls the flow of water to the ice maker. If it’s not closing properly, it may allow an excessive amount of water into the ice mold. Look for signs of damage or leaks, and replace the valve if needed.
Additionally, check for any water leaks in the supply line leading to the refrigerator. Leaks can result in an overfilling of the ice mold, leading to larger ice cubes.
It’s worth noting that extreme cold in the freezer compartment can also cause larger ice cubes. Ensure that the temperature settings are appropriately configured.
Regular maintenance is key. Cleaning the ice maker with a solution of water and vinegar can help remove mineral deposits that may be affecting its performance.
If these steps don’t resolve the issue, consulting the user manual for your specific refrigerator model may provide further guidance. If you’re unsure about any of the procedures, or if the problem persists, it’s advisable to contact a professional technician or the manufacturer’s customer service for specialized assistance. They can offer specific advice based on the make and model of your refrigerator.
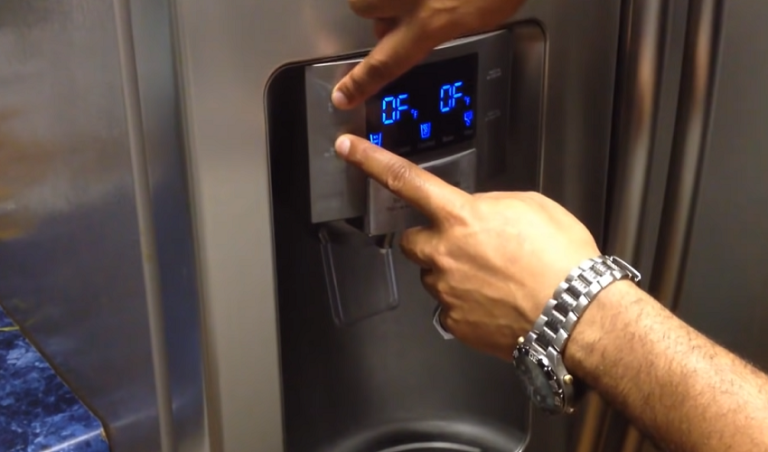
2. Software Glitch
If you suspect a software glitch is causing issues with your refrigerator, it’s essential to consider the following steps to identify and potentially resolve the problem.
Firstly, check if there are any available software updates for your refrigerator model. Manufacturers often release updates to address bugs and improve functionality. Consult the user manual or visit the manufacturer’s website for instructions on how to update the software.
If an update is not available or doesn’t resolve the issue, try performing a reset on the refrigerator’s control panel. This can often clear out any temporary software glitches. Refer to the user manual for specific instructions on how to perform a reset for your particular model.
In some cases, a prolonged power outage or electrical surge can lead to software malfunctions. To address this, unplug the refrigerator from the power source for a few minutes, then plug it back in and power it on. This process can sometimes reset the software and resolve minor glitches.
If the problem persists, consider contacting the manufacturer’s customer service or technical support for further assistance. They may have specific troubleshooting steps or be aware of known software issues with your model.
It’s important to note that attempting to manipulate the software of a refrigerator beyond standard user-interface options may void any warranties and could potentially cause further issues. Always follow manufacturer-recommended procedures for troubleshooting and maintenance.
3. Failed Defrost Function
If your refrigerator is experiencing issues with its defrost function, it’s crucial to address the problem promptly. Here’s a detailed explanation of the potential causes and corresponding solutions:
A common cause of a failed defrost function is a faulty defrost timer. This timer controls when the refrigerator enters into the defrost cycle. If it’s not functioning correctly, the refrigerator may not go through the necessary defrosting process. To fix this, locate the defrost timer (usually found behind the refrigerator, beneath a cover) and replace it with a compatible new one.
Another possible issue could be a malfunctioning defrost heater. This component is responsible for melting frost and ice buildup on the evaporator coils. If it’s not working, frost may accumulate, leading to cooling problems. A multimeter can be used to test the continuity of the defrost heater. If it’s found to be defective, it should be replaced.
Additionally, check the defrost thermostat. This device monitors the temperature of the evaporator coils. If it’s not functioning correctly, it may not signal the defrost heater to activate. Testing the thermostat’s continuity with a multimeter can help determine if it needs replacement.
Inspect the defrost control board, if applicable. This component controls the operation of the defrost system and can fail over time. If it’s found to be defective, it should be replaced.
Clear any visible frost or ice buildup on the evaporator coils and surrounding areas. This may temporarily restore functionality while you address the underlying issue.
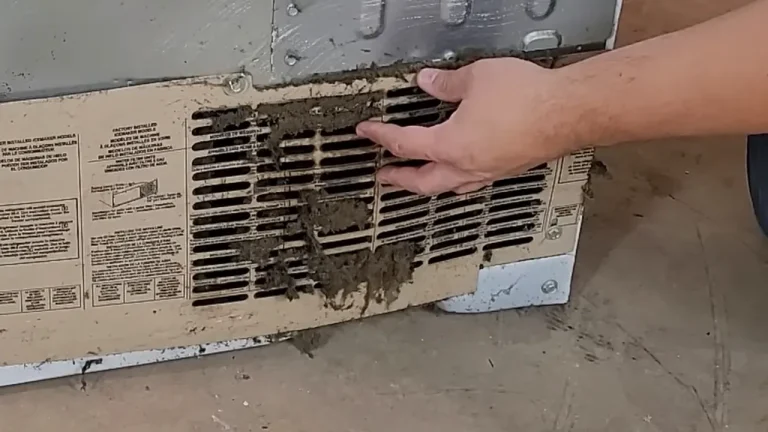
Regularly cleaning the condenser coils at the back or bottom of the refrigerator can help prevent issues related to heat exchange, which can impact the defrost function.
If you’re uncomfortable or inexperienced with refrigerator repair, it’s recommended to contact a professional technician or the manufacturer’s customer service for specialized assistance. They can provide specific guidance based on the make and model of your refrigerator, ensuring a safe and effective resolution to the problem.
4. Ice Clumping
When ice in your refrigerator forms clumps instead of individual cubes, it can be frustrating. Here are some details on why this might be happening and how to fix it:
One common cause of ice clumping is fluctuating freezer temperatures. If the temperature in the freezer is not consistently maintained, the ice cubes can partially melt and then refreeze, causing them to stick together. To fix this, check the temperature settings and adjust them if needed. It’s recommended to keep the freezer at around 0°F (-18°C) for optimal ice production.
Another potential cause is leaving the ice bin open for extended periods. Moisture from the air can enter the bin and cause the ice to stick together. Make sure to close the ice bin securely after each use to prevent this from happening.
If your refrigerator has a self-defrosting feature, make sure it’s functioning properly. A malfunctioning defrost system can lead to excess moisture in the freezer, which can contribute to ice clumping. If you suspect an issue with the defrost system, refer to the steps provided in the section on “Failed Defrost Function” for troubleshooting.
Regularly clean the ice bin to remove any residue or buildup that could cause the ice to stick together. Warm water and mild dish soap can be used for cleaning. Be sure to rinse thoroughly and allow the bin to dry completely before returning it to the freezer.
Consider using an ice bin liner or bag. These are designed to help prevent ice cubes from sticking together. They can be especially useful if you don’t use ice frequently.
If you’ve tried these steps and the issue persists, it’s advisable to contact a professional technician or the manufacturer’s customer service for further assistance. They can provide specific advice based on the make and model of your refrigerator.
5. Insufficient Ice
When your refrigerator isn’t producing enough ice, it can be inconvenient. Here’s an explanation of potential causes and how to address the issue:
One possible reason for insufficient ice production is a low water supply. Check if the water supply line to the refrigerator is fully open and free from any kinks or obstructions. Additionally, make sure the water pressure is adequate. If needed, adjust the water supply to improve the flow.
Inspect the water filter, if your refrigerator is equipped with one. A clogged or old filter can restrict water flow to the ice maker. Replace it according to the manufacturer’s recommendations.
Verify that the freezer temperature is set to the appropriate level, typically around 0°F (-18°C). If the freezer is too warm, it can impede the ice-making process.
Check the ice maker for any visible obstructions or ice buildup that might be hindering its operation. Clean any debris or frost that you find.
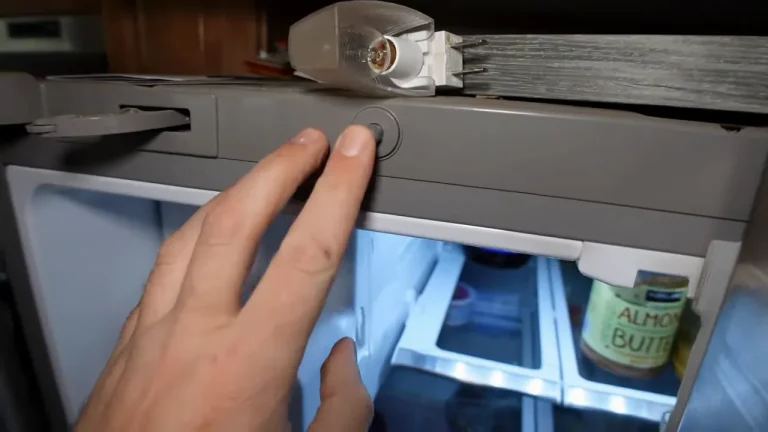
Ensure that the ice maker is turned on. Some models have a switch or lever that allows you to manually turn the ice maker on or off.
Examine the water inlet valve. If it’s malfunctioning, it may not be supplying enough water to the ice maker. Replace it if necessary.
Consider the size of the ice cubes being produced. If they’re large, it might seem like there’s less ice overall. Refer to the section on “Larger Ice Cubes” for instructions on how to adjust the ice maker’s water fill level.
Regularly clean the condenser coils at the back or bottom of the refrigerator. Dirty coils can lead to inefficient cooling, which can affect ice production.
If you’ve followed these steps and still experience insufficient ice production, it’s recommended to contact a professional technician or the manufacturer’s customer service for further assistance. They can offer specific guidance based on the make and model of your refrigerator.
Troubleshooting a GE Ice Maker Making Ice But Not Dumping
If your GE refrigerator’s ice maker is producing ice but not ejecting it into the ice bin, there are several potential causes to consider. Firstly, check if the ice maker arm or bail is in the correct position. It should be in the down position for the ice maker to function properly. If it’s in the up position, it may have been manually turned off, causing the ice production to halt.
Next, inspect the ice maker for any obstructions or ice buildup that might be preventing the cubes from being dispensed. Clear away any debris or frost that you find. Additionally, ensure that the ice bin is properly positioned and not overfilled, as this can impede the dumping process.
Verify that the temperature in the freezer is set to the recommended level, typically around 0°F (-18°C). If the freezer is too warm, it can affect the ice-making process.
Check the water supply line to the refrigerator. Make sure it’s not kinked or obstructed, and that the water pressure is sufficient for proper ice production.
If these steps don’t resolve the issue, it’s advisable to consult the GE refrigerator’s user manual for model-specific troubleshooting steps. You may also consider reaching out to GE’s customer support or contacting a professional technician for further assistance. They can provide specialized guidance based on the make and model of your GE refrigerator.
Troubleshooting an LG Ice Maker Making Ice But Not Dumping
If your LG refrigerator’s ice maker is producing ice but not ejecting it into the ice bin, there are a few potential causes to consider. First, ensure that the ice maker is turned on and that the ice maker arm or bail is in the down position. If it’s in the up position, the ice maker may be manually turned off, which would halt the ice production.
Next, inspect the ice maker for any obstructions or ice buildup that might be preventing the cubes from being dispensed. Clear away any debris or frost that you find. Additionally, check if the ice bin is properly positioned and not overfilled, as this can impede the dumping process.
Verify that the temperature in the freezer is set to the recommended level, typically around 0°F (-18°C). If the freezer is too warm, it can affect the ice-making process.
Check the water supply line to the refrigerator. Ensure it’s not kinked or obstructed, and that the water pressure is sufficient for proper ice production.
LG refrigerators with ice makers often have a test button on the front of the ice maker. Pressing this button can initiate a test cycle, which may help diagnose any mechanical issues.
If these steps don’t resolve the issue, consult the LG refrigerator’s user manual for model-specific troubleshooting steps. You may also consider reaching out to LG’s customer support or contacting a professional technician for further assistance. They can provide specialized guidance based on the make and model of your LG refrigerator.
FAQ:
Why is my ice maker producing ice but not ejecting it into the ice bin?
This issue can be caused by a few different factors. It’s important to check if the ice maker arm or bail is in the down position, as it needs to be in this position for the ice maker to function properly. Additionally, inspect the ice maker for any obstructions or ice buildup that might be preventing the cubes from being dispensed.
What should I do if the ice maker arm is in the up position?
If the ice maker arm is in the up position, it means the ice maker has been manually turned off. To resolve this, gently lower the arm to the down position. This should initiate the ice-making process.
Could a clogged water supply line be causing the issue?
Yes, a clogged or obstructed water supply line can impede the ice-making process. Check the water supply line to ensure it’s free from any kinks or blockages.
How can I check if the ice bin is causing the problem?
Ensure that the ice bin is properly positioned and not overfilled. An overfilled ice bin can prevent the ice cubes from being dispensed. Clear any excess ice to allow for proper dumping.
Can improper freezer temperature affect ice production?
Yes, if the freezer temperature is set too warm, it can hinder the ice-making process. The recommended freezer temperature for optimal ice production is around 0°F (-18°C).
What if none of these solutions work?
If the issue persists after trying the above steps, consult the refrigerator’s user manual for model-specific troubleshooting. You may also consider reaching out to the manufacturer’s customer support or contacting a professional technician for further assistance. They can provide specialized guidance based on the make and model of your refrigerator.
As an Amazon Associate I earn from qualifying purchases.

- Can You Put Clouds Shoes in the Washing Machine? With Tips & Tricks - April 10, 2024
- European Washing Machine vs American – History, Design, Technology - March 27, 2024
- Can You Put Boxing Gloves In The Washing Machine? – Expert Tips - March 25, 2024

![Why Does the Samsung Refrigerator Noise Stop When Door Opened? [Solving the Mystery]](https://homeplacetips.com/wp-content/uploads/2023/10/Samsung-Refrigerator-Noise-Stops-When-Door-Open-768x461.png)
![How Many Watts Does a Refrigerator Use Per Day [Regular/Mini Fridge]](https://homeplacetips.com/wp-content/uploads/2023/09/How-Many-Watts-Does-a-Refrigerator-Use-Per-Day-768x461.png)