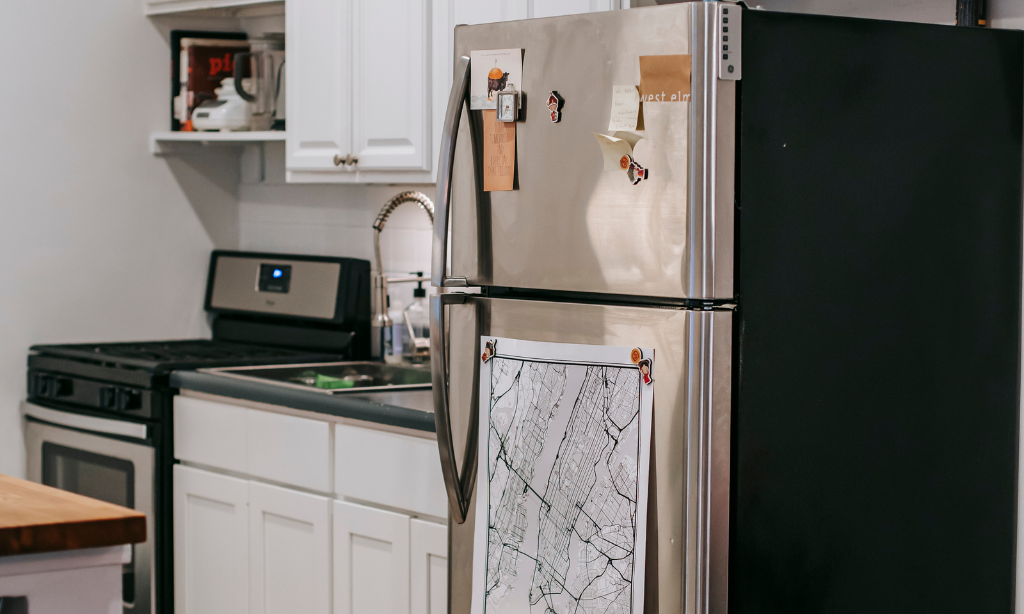
GE Refrigerator Water Filter Problems [Troubleshooting and Solutions]
A functioning water filter in a refrigerator plays a crucial role in ensuring the quality and safety of the water dispensed from the appliance. Firstly, it serves as a barrier against impurities and contaminants that may be present in the water supply. This includes sediment, chlorine, heavy metals, bacteria, and various chemicals.
By effectively removing these substances, a water filter ensures that the water used for drinking, cooking, and making ice is clean and safe for consumption. This is particularly vital in areas with questionable water quality, as it provides an extra layer of protection for the health of individuals and families. Moreover, a properly functioning filter enhances the taste and odor of the water, making it more palatable and enjoyable.
It also helps maintain the integrity of the refrigerator’s internal components, preventing potential damage caused by sediment or mineral buildup. In essence, a functioning water filter not only safeguards health but also contributes to the overall convenience and longevity of the refrigerator. Regular maintenance and timely replacement of the filter are essential to ensure it continues to perform its crucial role effectively.
What is a GE refrigerator water filter?
A GE refrigerator water filter is a specialized component designed to purify and improve the quality of water dispensed by General Electric (GE) refrigerators. These filters are typically located inside the refrigerator, often near the top or bottom of the compartment.
Their primary function is to remove impurities and contaminants from the water supply, ensuring that the water used for drinking, cooking, and making ice is clean, safe, and free from potentially harmful substances. GE refrigerator water filters employ various filtration technologies, such as activated carbon and other media, to effectively trap and remove particles, sediments, chlorine, bacteria, and a range of chemicals.
This filtration process results in water that not only tastes better but is also healthier for consumption. Many GE refrigerators are equipped with indicator lights or monitors that signal when it’s time to replace the filter, typically after a certain volume of water has passed through it or after a specific duration of use. Regular replacement is crucial to maintain the filter’s effectiveness and ensure continued high-quality water output.
What are the benefits of using a GE refrigerator water filter?
Using a GE refrigerator water filter offers several benefits:
- Improved Water Quality: The filter effectively removes impurities, contaminants, and odors, providing cleaner and better-tasting water for drinking, cooking, and making ice.
- Healthier Drinking Water: By eliminating potentially harmful substances like chlorine, bacteria, and heavy metals, the filter ensures that the water is safer and healthier for consumption.
- Protection Against Sediment: The filter prevents sediment and particles from entering the refrigerator’s internal components, reducing the risk of damage and prolonging the lifespan of the appliance.
- Convenience and Accessibility: Having a filtered water dispenser in the refrigerator door means instant access to clean water, eliminating the need for separate filtration devices or the hassle of purchasing bottled water.
- Environmental Benefits: Using a water filter reduces the need for single-use plastic bottles, contributing to a decrease in plastic waste and a more sustainable lifestyle.
- Cost-Efficient: While there is an initial investment in purchasing replacement filters, it is generally more cost-effective than constantly buying bottled water over time.
- Maintains Ice Quality: The filtered water also improves the quality and taste of the ice produced by the refrigerator, enhancing the overall beverage experience.
- Peace of Mind: Knowing that the water from your refrigerator is filtered provides confidence that you are consuming safe and clean water.
- Easy Installation and Replacement: GE refrigerator water filters are designed for easy installation and replacement, making maintenance a straightforward process.
- Compliance with Manufacturer Recommendations: Using the recommended filter ensures that the refrigerator functions optimally, and it may be a requirement for maintaining the manufacturer’s warranty.
Common GE refrigerator water filter problems
1. Slow Water Dispenser or No Water at All
If the water dispenser in your GE refrigerator is slow or not dispensing water at all, it may be due to a clogged or improperly installed water filter.
Fix:
- Check the Filter: Start by inspecting the water filter. Ensure it is properly seated and not expired. If it’s clogged or past its recommended lifespan, it should be replaced.
- Replace the Filter: If the filter is old or clogged, it’s time to replace it. Follow the manufacturer’s instructions for removing and installing a new filter. Make sure it clicks into place securely.
- Flush the System: After replacing the filter, run several cups of water through the dispenser to flush out any air or loose particles. This helps ensure a smooth flow of water.
- Check Water Supply: Ensure there are no kinks in the water supply line or any obstructions that might be impeding water flow.
- Check Water Pressure: Verify that the water pressure to the refrigerator is adequate. Low water pressure can cause slow dispensing.
- Inspect the Inlet Valve: If all else fails, check the water inlet valve. It may be malfunctioning and in need of replacement.
2. Leaking water filter
If you notice water leaking from your GE refrigerator’s water filter, it’s crucial to address the problem promptly to prevent any potential water damage.
Fix:
- Inspect Installation: Ensure that the water filter is correctly installed. It should be securely seated, and the locking mechanism should be engaged. If the filter is not fitted properly, it may cause leaks.
- Check for Damage: Examine the filter for any cracks, breaks, or signs of damage. If you find any, replace the filter immediately. Damaged filters can’t effectively contain water and need to be replaced.
- Tighten Connections: If the filter is correctly installed but still leaking, check the connections on both ends of the filter. Make sure they are snugly tightened without over-torquing.
- Inspect O-rings or Gaskets: Some filters have O-rings or gaskets that create a watertight seal. Check these for any wear or damage. If they appear compromised, replace them or the entire filter.
- Check for Clogs: A clog in the water lines leading to or from the filter can lead to increased pressure and cause leaks. Ensure there are no obstructions in the lines.
- Replace the Housing: If the housing unit itself is cracked or damaged, it will need to be replaced. Contact GE or a certified technician to order and install a new housing unit.
- Regular Maintenance: Ensure you replace the filter at the recommended intervals to avoid overuse, which can lead to wear and leaks.
3. Water dispenser not working
When the water dispenser in your GE refrigerator is not working, it can be frustrating. Here are steps to troubleshoot the problem:
Fix:
- Check Water Supply: Ensure that the refrigerator is connected to a water source and that the water supply valve is turned on. If there is no water supply, the dispenser will not function.
- Inspect Water Filter: A clogged or expired water filter can hinder water flow. Check the filter for any clogs, damage, or expiration. If necessary, replace it following the manufacturer’s guidelines.
- Flush the System: After installing a new filter or if the refrigerator has been unused for a while, flush the system by dispensing several cups of water to remove air and debris.
- Check for Frozen Lines: In some cases, water lines inside the refrigerator can freeze, blocking water flow. Temporarily adjust the refrigerator’s temperature settings to see if this resolves the issue.
- Inspect Dispenser Switch: Ensure that the dispenser switch is not stuck or malfunctioning. Press and release the switch to see if it engages properly.
- Examine Water Inlet Valve: The water inlet valve controls the flow of water to the dispenser. If it’s faulty, it may need to be replaced. Consult a professional technician for this task.
- Look for Kinks or Obstructions: Inspect the water supply line for kinks or bends that may be restricting water flow. Also, make sure there are no obstructions in the line.
- Check for Low Water Pressure: Low water pressure can hinder the dispenser’s performance. Verify that the water pressure to the refrigerator is sufficient.
- Inspect Water Reservoir: If applicable, check the water reservoir for any cracks or damage. A damaged reservoir may need to be replaced.
4. Ice maker not working
When the ice maker in your GE refrigerator isn’t producing ice, it can be frustrating. Here’s a step-by-step guide to troubleshooting and potentially resolving the problem:
Fix:
- Check the Power: Ensure the refrigerator is plugged in and receiving power. Sometimes, a loose plug or tripped circuit breaker can be the culprit.
- Verify the Ice Maker is Turned On: Some models have an on/off switch for the ice maker. Make sure it’s in the “on” position.
- Check for a Jammed Ice Maker Arm: If the ice maker has an arm that manually lowers to initiate ice production, ensure it’s not stuck or obstructed. Gently lower the arm if necessary.
- Inspect the Water Supply: Confirm that the refrigerator is connected to a water supply and that the water valve is turned on. Without water, the ice maker won’t be able to produce ice.
- Look for Frozen Water Line: In cold conditions or if the freezer temperature is set too low, the water supply line leading to the ice maker may freeze. Allow it to thaw or adjust the temperature settings accordingly.
- Clear Ice Bin Obstructions: Check the ice bin for any obstructions that may be preventing the ice maker from dispensing ice. Clear out any clumps or debris.
- Inspect the Water Filter: A clogged or expired water filter can hinder ice production. Verify if the filter is in good condition or replace it following the manufacturer’s recommendations.
- Reset the Ice Maker: Many models have a reset button or sequence. Consult the user manual to learn how to reset your specific ice maker.
- Check for Low Water Pressure: Insufficient water pressure can affect ice production. Ensure the water pressure to the refrigerator is adequate.
- Inspect the Inlet Valve: The water inlet valve controls the flow of water to the ice maker. If it’s faulty, it may need to be replaced. Consider consulting a professional technician.
5. Bad taste or odor in water
If you notice an unpleasant taste or odor in the water from your GE refrigerator, it’s important to address it promptly for better water quality.
Fix:
- Replace the Water Filter: An expired or clogged water filter can lead to off-flavors or odors. Replace the filter according to the manufacturer’s recommendations.
- Flush the System: After installing a new filter, run a few cups of water through the dispenser to flush out any air or loose particles that may be affecting the taste.
- Clean the Water Dispenser and Reservoir: Over time, mold, bacteria, or mineral deposits can accumulate in the water dispenser or reservoir, contributing to a bad taste or smell. Clean these parts regularly using a mixture of warm water and mild detergent.
- Check Water Source: If your refrigerator is connected to a well or another non-municipal water source, consider having your water tested for impurities that may be causing the taste or odor.
- Inspect Water Supply Lines: Ensure that the water supply lines are clean and free from any contaminants. If necessary, replace old or worn-out lines.
- Check for Mold or Mildew: Inspect the water lines and connectors for any signs of mold or mildew. Clean and disinfect affected areas with a mixture of water and vinegar.
- Consider a Charcoal Filter: In addition to the standard water filter, consider adding a charcoal filter or a separate filtration system to further improve the taste and odor of the water.
- Check for Contaminated Ice: If the ice from your refrigerator also has a bad taste or odor, ensure the ice maker and ice bin are clean and free from any impurities.
Troubleshooting GE refrigerator water filter problems
How to check if your water filter is clogged
Checking if your water filter is clogged is a straightforward process. Here are the steps you can follow:
- Locate the Water Filter: Identify where the water filter is located in your refrigerator. It’s typically found in the upper right-hand corner of the refrigerator compartment or in the base grille.
- Turn Off the Water Supply: Before proceeding, it’s important to turn off the water supply to the refrigerator. This is usually done by turning the water shut-off valve on the water supply line.
- Remove the Water Filter: Depending on your refrigerator model, you might need to push a release button, turn the filter counterclockwise, or follow the specific removal instructions in your user manual.
- Examine the Filter: Take a close look at the filter. Check for visible signs of clogs, such as sediment, debris, or discoloration.
- Run Water Through the Filter: If you’re unsure about the condition of the filter, try running a small amount of water through it. Observe the flow rate and look for any signs of blockage.
- Compare with a New Filter: If you have a new filter available, compare it to the one you removed. A clogged filter will likely have a noticeable difference in appearance.
- Check the Manufacturer’s Recommendations: Refer to the user manual or manufacturer’s guidelines to see if there are specific indicators or guidelines for assessing filter clogs.
- Consider the Filter’s Age and Usage: If the filter has been in use for an extended period (beyond its recommended lifespan) or if it serves a high-demand household, it’s more likely to be clogged.
- Replace the Filter: If you observe signs of clogging, or if the filter is past its recommended lifespan, it’s advisable to replace it. Follow the manufacturer’s instructions for installation.
- Run Water Through the New Filter: After installing the new filter, run a few cups of water through the dispenser to flush out any air or loose particles.
How to replace a GE refrigerator water filter
Replacing a water filter in a GE refrigerator is a straightforward process. Here’s a step-by-step guide to help you through it:
Locate the Water Filter
Find the location of the water filter in your refrigerator. It is typically located in the upper right-hand corner of the refrigerator compartment or in the base grille.
Turn Off the Water Supply
Locate the water shut-off valve either behind or beneath the refrigerator and turn it off. This step ensures that no water will flow while you’re replacing the filter.
Remove the Old Filter
- Depending on your model, you may need to:
- Push a release button and pull the old filter straight out.
- Turn the old filter counterclockwise to release it.
- Follow any specific removal instructions detailed in your user manual.
Prepare the New Filter
If your new filter comes with protective caps, remove them. Some filters may have a sticker indicating which end should be inserted first. Pay attention to these instructions.
Install the New Filter
- Push the new filter into the slot where the old one was. Depending on your model, you may need to:
- Push it in firmly until it clicks into place.
- Turn it clockwise until it locks securely.
- Follow any specific installation instructions provided by the manufacturer.
Run Water Through the Filter
Dispense about 2-3 gallons (or as recommended by the manufacturer) of water through the dispenser to flush out any air or loose particles. This ensures that you’re getting clean water from the new filter.
Check for Leaks
Look around the filter area and the water lines to ensure there are no leaks. If you notice any, double-check the installation and connections.
Reset the Filter Indicator
Some GE refrigerators have a filter indicator light that needs to be reset after a filter change. Refer to your user manual for instructions on how to do this.
Turn On the Water Supply
Turn the water shut-off valve back on. This will allow water to flow to the dispenser and ice maker.
How to fix a leaking water filter
Fixing a leaking water filter in your refrigerator involves several steps. Here’s a guide to help you address the issue:
- Turn Off Water Supply: Before you begin, turn off the water supply to the refrigerator. This is typically done by shutting off the water valve on the supply line.
- Remove the Filter: Take out the leaking water filter from its housing. Refer to your user manual for specific instructions on how to do this for your refrigerator model.
- Inspect the Filter for Damage: Examine the filter for cracks, breaks, or signs of damage. If you find any, the filter is likely the source of the leak and should be replaced.
- Check the Housing for Leaks: Examine the filter housing for any cracks, loose fittings, or damaged O-rings or gaskets. These could be causing the leak.
- Clean the Filter Housing: Clean the housing thoroughly to ensure there are no debris or sediments that might be affecting the seal.
- Replace O-rings or Gaskets : If your filter has O-rings or gaskets, check them for wear or damage. If they’re compromised, replace them.
- Ensure Proper Installation: Reinsert the filter, making sure it is properly seated and securely locked in place. Follow the specific installation instructions for your refrigerator model.
- Tighten the Connections: Make sure all connections around the filter are snug but not over-tightened. This includes both the water line connections and the filter itself.
- Turn On Water Supply: Turn the water supply back on and check for any signs of leaking. If you notice a leak, turn off the water supply again and recheck the connections.
- Monitor for Leaks: Observe the filter and its surroundings for any signs of leakage over the next few hours. Keep an eye on it to ensure the issue has been resolved.
- Run Water Through the Filter: Dispense a few cups of water through the dispenser to flush out any air or loose particles. This also helps ensure that the filter is properly seated.
How to troubleshoot a water dispenser that is not working
If you’re facing the issue of a water dispenser not working on your refrigerator, there are several troubleshooting steps you can take. First, ensure that the refrigerator is properly plugged in and receiving power.
Next, check if the water supply is connected and the shut-off valve is open. If the water supply is intact, inspect the water filter. A clogged or expired filter can impede water flow. Replace it if necessary.
Flush the system by dispensing a few cups of water to remove any air or loose particles. Check for frozen water lines, especially in colder environments, and allow them to thaw if needed. If the dispenser still doesn’t work, inspect the dispenser switch for any malfunctions.
Finally, if none of these steps resolve the issue, it’s advisable to consult a professional technician or the manufacturer for further diagnosis and repair. Remember, safety precautions should always be taken when troubleshooting any electrical appliance.
How to troubleshoot an ice maker that is not working
If your ice maker isn’t producing ice, you can follow these troubleshooting steps to potentially identify and fix the issue:
- Check Power and Water Supply: Ensure that the refrigerator is plugged in and receiving power. Also, confirm that the water supply to the refrigerator is connected and turned on.
- Verify the Ice Maker is Turned On: Some models have an on/off switch for the ice maker. Make sure it’s in the “on” position.
- Inspect for a Jammed Ice Maker Arm: If your ice maker has an arm that manually lowers to initiate ice production, ensure it’s not stuck or obstructed. Gently lower the arm if necessary.
- Check for a Full Ice Bin: If the ice bin is already full, the ice maker may be programmed to stop producing ice until some is used. Empty the bin if it’s full.
- Look for Frozen Water Lines: In cold environments or if the freezer temperature is set too low, the water supply line leading to the ice maker may freeze. Allow it to thaw or adjust the temperature settings.
- Clear Obstructions in the Ice Maker: Check for any ice cubes or foreign objects that may be blocking the ice maker’s operation.
- Inspect the Water Inlet Valve: The water inlet valve controls the flow of water to the ice maker. If it’s faulty, it may need to be replaced.
- Check for Low Water Pressure: Insufficient water pressure can affect ice production. Ensure the water pressure to the refrigerator is adequate.
- Clean the Ice Maker: If there is a build-up of scale or debris, clean the ice maker and its components following the manufacturer’s recommendations.
- Reset the Ice Maker: Some models have a reset button or sequence. Consult your user manual to learn how to reset your specific ice maker.
How to improve the taste or odor of your water
Improving the taste or odor of your water is essential for ensuring it’s enjoyable and safe for consumption. Here are some steps you can take:
- Use a Water Filter: Installing a quality water filter can effectively remove impurities, contaminants, and odors, resulting in cleaner and better-tasting water.
- Replace Expired or Clogged Filters: Regularly change your water filter according to the manufacturer’s recommendations. Clogged or expired filters can lead to a decrease in water quality.
- Clean and Sanitize Your Water Dispenser: Periodically clean the water dispenser and reservoir to prevent the growth of mold, bacteria, or algae, which can cause unpleasant tastes and odors.
- Flush the System: If you’ve recently replaced the filter, run a few cups of water through the dispenser to flush out any air or loose particles that may be affecting the taste.
- Use Activated Carbon Filters: Activated carbon filters are particularly effective at removing odors and impurities from water. Consider using a filter with this technology.
- Consider a Water Softener: If your water has a high mineral content, a water softener can help remove excess minerals, which can affect taste and odor.
- Keep Your Water Source Clean: Ensure that the water source feeding into your refrigerator is clean and free from any contaminants that may affect the taste.
- Use Fresh Ice Cubes: If your ice maker has a filter, make sure it’s clean and replace it as needed. Fresh ice will contribute to a better overall taste.
- Store Water Properly: If you store water in containers, make sure they are clean and sanitized to prevent any transfer of tastes or odors.
Preventive maintenance tips for GE refrigerator water filters
Regular maintenance of your GE refrigerator’s water filter is essential to ensure it functions effectively and provides clean, safe water. Here are some preventive maintenance tips:
- Regular Filter Replacement: Follow the manufacturer’s recommendations for filter replacement. Typically, this is every 6 months, but it can vary depending on usage and water quality.
- Use Genuine GE Filters: Always use filters recommended or provided by GE. Generic or off-brand filters may not fit or function properly, potentially compromising water quality.
- Proper Installation: Ensure the filter is installed correctly, following the instructions provided in the user manual. This includes securely locking it in place and checking for leaks.
- Check for Water Leaks: Periodically inspect the area around the filter for any signs of leaks. If you notice any, address the issue promptly.
- Clean the Water Dispenser and Reservoir: Regularly clean the water dispenser and reservoir to prevent the growth of mold, bacteria, or algae, which can affect water quality.
- Flush the System: After replacing the filter, run a few cups of water through the dispenser to flush out any air or loose particles. This helps ensure clean water flow.
- Inspect O-rings or Gaskets: If your filter has O-rings or gaskets, check them for wear or damage. Replace them as needed.
- Store Filters Properly: If you purchase replacement filters in advance, store them in a cool, dry place and away from direct sunlight to maintain their effectiveness.
- Check Water Quality: If you notice a change in water quality, such as unusual taste or odor, consider having your water tested. This may indicate the need for more frequent filter replacements.
FAQ:
Why is my water flow from the dispenser slow?
A slow water flow can be attributed to a clogged or expired water filter. Over time, mineral deposits can accumulate in the filter, restricting water flow. Replacing the filter should improve water flow.
Why does my water have a strange taste or odor?
A strange taste or odor in the water often indicates an expired or clogged filter. Filters lose their effectiveness over time, allowing impurities to affect the water’s taste and smell. Replacing the filter should resolve this issue.
How do I know when it’s time to replace the water filter?
Most GE refrigerators have an indicator light that signals when it’s time to replace the water filter. This light typically changes color or flashes after a specific volume of water has been dispensed, usually about every 6 months.
My water filter is leaking. What should I do?
A leaking water filter could be due to improper installation, a damaged filter, or a faulty filter housing. Ensure the filter is correctly installed and not damaged. If the issue persists, consider replacing the filter or consulting a technician for further diagnosis.
Can I use a non-GE branded water filter in my GE refrigerator?
While it’s possible to use a non-GE branded filter, it’s recommended to use genuine GE filters. They are specifically designed for GE refrigerators and are guaranteed to fit and function correctly.
Is it normal to have a slight decrease in water pressure after replacing the filter?
Yes, it’s normal to experience a slight decrease in water pressure immediately after replacing the filter. This is typically temporary and is due to air bubbles in the system. Running a few cups of water through the dispenser should restore normal pressure.
How can I prevent water filter problems in the future?
Regular maintenance is key to preventing water filter problems. Replace the filter as recommended by the manufacturer (usually every 6 months), ensure proper installation, and clean the water dispenser and reservoir periodically.
What should I do if my water filter problems persist despite troubleshooting?
If you’ve tried troubleshooting steps and the problems persist, it’s advisable to contact a certified technician or GE customer service for further diagnosis and repair. There may be an underlying issue that requires professional attention.
As an Amazon Associate I earn from qualifying purchases.
- Can You Put Clouds Shoes in the Washing Machine? With Tips & Tricks - April 10, 2024
- European Washing Machine vs American – History, Design, Technology - March 27, 2024
- Can You Put Boxing Gloves In The Washing Machine? – Expert Tips - March 25, 2024

![How Long Is Cake Good For in The Fridge? [Expert Answer!]](https://homeplacetips.com/wp-content/uploads/2024/01/cakes-in-my-refrigerator_-which-refrigerator-is-suitable-for-Home-bakers__000004341-768x432.webp)

![Whirlpool Gold Refrigerator Not Making Ice [Troubleshooting Guide]](https://homeplacetips.com/wp-content/uploads/2023/10/Whirlpool-Gold-Refrigerator-Not-Making-Ice-768x461.png)
![GE Cafe Refrigerator Problems [Solved 2024]](https://homeplacetips.com/wp-content/uploads/2023/12/GE-refrigerator-not-cooling_-Check-these-5-things-first_000056819-768x432.webp)